Friday, December 31, 2010

sponge worthy

I've been saving some pieces of foam from old packages -- my idea to help stop the draftiness in my windows was to cut these to size and slip them in the groove between the sash meeting point and the parting bead. It's an impermanent solution as is, but it seems to work pretty well. I cut down the draftiness big time with just this little trick so I know I'm on the right track. If the Easy Stop doesn't work I'm thinking of doing a McGuyver and gluing these to the bead. I think they would be fairly durable. We'll see..


Thursday, December 30, 2010

window insulation

With old man winter beginning to wake up from his slumber, I've been thinking alot about insulation for my windows, particularly the upstairs bedrooms. Currently I'm working on restoring the two side windows in my daughter's room. Since I can't just squirrel these away for a few weeks and work on them full on, the progress is slow. I'm just about halfway done with both of these. What's different about these windows is I did these the "correct" way. That is, removing old glaze then pulling out the glass to clean it. Sand the rabbet (the groove the glass rests in), then reinstall on a bed of silicone. Prime it, glaze it, paint it. So yeah, it's a thing of patience. My window of opportunity is closing (pun intended) so need to finish these up for the season.

The whole point to fixing these windows aside from the whole restoration thing is to make them airtight. Drafty windows suck -- despite their beauty, my wood sashes need some tightening up. The glass on these two windows was barely hanging on. Honestly I don't know how they didn't just fall out with our spring winds. I fixed the glass firmly in place and added some expanding foam in the crevices to the rear of the sill, then caulked the windows. But the windows were still draftier than I expected. A big reason for this is the gap along the parting bead where the upper and lower sash meet. See below.

I estimate I can eliminate 50 to 60 percent of the problem by fixing that gap. But what to use? I've been reading up on This Old House on how to tighten up old windows and one thing I've come across is the Easy Stop system. I'm very interested in that it just doesn't have some silicone strip you put on the bottom and top sash, but a replacement parting bead with insulation built in. I will be investigating this further and have ordered me a sample kit to see if it'll work for me.

In the above picture you'll notice the edge of a metal strip the sash rides on. You may recall I've referred to this stuff as sash rail. I'm not sure if it is original to the house but it does seem to be an attempt at insulation. Of course the bottom part of the sash has a groove that's pretty tight, but the upper part where the sash cord rests in has a significantly wider channel. It's here where we have a problem with air penetration. I'm not sure the Easy Stop will totally fix this (seems like a big gap), but I'm hoping it will. In the meantime I have a temporary solution to help stop the chill this winter..


Friday, December 24, 2010

the attic

Up until a few months ago I'd never had the guts or inclination to venture up into my attic. It's not exactly easy to get into. The access hatch is in the guest bedroom closet and takes some contortion to lift from the ladder and into an angle with which you can pull yourself up & over. I wasn't really sure what to expect -- hidden treasure, a corpse? The possibilities were endless.

The air was thick with a very fine dust so I'm glad I strapped on the dust mask before my ascent. The reason why I went up there in the first place is we had a few big rainstorms in the fall and I noticed water dripping in from the ceiling in the guest bedroom. Didn't want to, but I knew I had to go check it out. A few things surprised me. One, there's insulation up there. I question it's R value, but I figure it's probably better than nothing. Looks like blown in cellulose. There had once been vines crawling up the exterior walls and I found evidence of them up there too. There must be quite a few breaches in the exterior armor that allowed this stuff to get in there. The old duct work from the evaporative AC unit was still intact save for quite a bit of rust on the piece connecting to the outside.

Check out all that water damage. When the HVAC guys installed the new system and removed the old one from the roof they didn't do a good patch job. The claims adjuster also found extensive hail damage from early this year. Luckily my insurance is going to cover the cost for a new roof. I'm super excited. That's one major project we'll be able to scratch off the list several years earlier than we were hoping for. This rocks. More updates in a few weeks...


Tuesday, December 14, 2010

pic of the day

franklin mountains state park

Monday, November 15, 2010

swanky curtain rods

One of the original reasons for fixing up the windows in this room is so I could finally put up some worthy curtain rods. As you can see in the pic above, come afternoon sun this room can really heat up. In summertime it becomes a blazing inferno. Thus the need to diffuse the light coming into the dining room. You can't see it here, but we actually put up a faux stained glass sheet over the big middle window. This helped bring down temperatures in this room big time. But there was always a need to put up some curtains over these windows both from a heat control standpoint and for privacy. Since these are in the back of the house, I guess heat control won out.. It's been five years that we've lived in this house and we still don't have curtains up downstairs -- these will be the first. I still have the other set of windows in the dining room to overhaul before dressing them up. Then we can finally go for the ones in the living room.

Ok enough with the backstory. I've had my eye on this set of curtain rods since we bought the place. We actually have a pair of the same style in the upstairs bedrooms with a nice oil rubbed bronze finish. I always wanted brass for the formal rooms though. As you can see they are a nice and shiny brass, which I'm not really a fan of. However these are unlacquered so over time will patina to a nice aged brass and match the rest of the brass hardware downstairs. They are nice and beefy though and are pretty heavy. Hopefully a future owner doesn't think they need to toss them as they were somewhat pricey. In fact, my wife has taken to calling them the $XXX curtain rods. I won't divulge how much they cost, but they weren't cheap. Let's leave it at that.

Something else that left a bad taste in my mouth is rejuvenation kept getting my order wrong. I ordered these way back in july and only now do I have the complete set I ordered. I know, I know.. The first time I got one mismatched set of finials. The second time I got my brass finials except they were lacquered. Third time's the charm I guess, as I now finally have all hardware in unlacquered brass. I wasn't too happy about that, but dammit I wanted these rods. It's taken forever, but I am finally content with my dining room windows. Helps give me a little motivation that I can actually finish a project and am not completely crazy refinishing all this wood..


Sunday, November 14, 2010

dining room windows saga continues

Wow it's been a while since I've posted anything resembling progress around here. Not to worry, I've been working on several projects. This would be my first blog worthy post in a while. As you can see above I've finally completed the far wall of windows and woodwork in my dining room. It's not a good picture since the light blasts through this room and it's hard to not wash out the detail. I actually sanded down, filled, stained, & poly'd a fairly significant part of this wall. The good thing is I think it's kind of hard to tell what was pseudo-original and the work I just did. I guess that's kinda the point -- I want it to look like it's always been that way.

Let's see, I completely redid the wood trim that spans over the top of all three windows as well as the upper/lower sash of the right window. I partially redid the left window sash and the center window. I also did some touch up on some of the lower trim underneath the windows. I refinished both window sills too. Thankfully I was able to match the color of the stain pretty well. I would call the stain color I'm going for something like an amber caramel. It has some orange-red tones, but the caramel richness helps keep it from looking too bright and light colored. After I put on the second coat of poly did I finally say to myself "wow, that looks pretty nice". I think so at least. It's not perfect, but I think it is so much better than what it used to look like. I can't believe I've been working on this wall for this long. Yes I've been distracted with other things along the way, but for the most part I've been working these off and on since july.

I'm hoping to get started on the trio of windows on the side wall next. Like these, the window sills are crap and need total refinishing as well as a few spots where old curtain rods used to be. There is some rot on the same places as the ones I just fixed, mostly the detail edge of the sash where it meets glass. To help make the back windows bulletproof from any future abuse, I used the same methods for the exterior of applying wood preservative, wood hardener, & epoxy/filler. The color is a little darker and redder than the rest of the stain, but I felt this was a worthy compromise. So like the back windows, I want the side windows completely solid inside and out. Hopefully a future owner of this house appreciates the work I've put into them and doesn't toss them out for some cheap vinyl..

Anywho, here's another picture that shows the three finishes in all their glory. The top finish is the despised ebony stain (which I'm still working on eradicating). The middle finish is the new stain/poly. And the bottom finish is the pseudo-original finish. I think the bottom two are pretty close and I don't think you'd really be able to tell they're not the same finish unless you got right up to them in certain areas. The sash detail that touches the glass is mostly the only place this is most obvious. There's more to the story so you'll have to wait till next time..


Friday, October 22, 2010

death of skunk tree

What is this thing? I've seen these trees all over this area and as far north as denver. What I do know is they grow ridiculously fast and are extremely invasive. They also have a very pungent stink when you rub against the trunk or leaves. Hence the name, skunk tree. This one grew to about 15ft tall in 2 years. I knocked it down though -- I got me a new tree and the perfect spot for it was where this skunk tree was standing.

I don't think el paso is usually thought of as a place to grow citrus trees. It's not common, but I do see it every once in a while. Just down the street from me is an orange tree tucked in between two houses. I'm trying a similar strategy. This one is a mexican lime tree and I'm super excited to put it to good use. Time to make some guacamole.. Mmm.


Wednesday, September 15, 2010

happy tree = happy world

I love trees.

There I said it. One thing that really bugs me about this neighborhood is there are no trees here. Actually that could go for much of the city. Unless you live in the valleys, you are relegated to lots of brown and lots of sun. I understand that we live in the desert. That doesn't mean we have to make our surroundings bare and desolate. Trees just make me happy. I blame the time I lived in chicago for my expectation of lots of green leafy foliage. Countless neighborhoods are lined with massive 100+ year old trees. Makes me wish we could do the same here in old el paso. I know due to the climate we could never get trees to grow to monstrous proportions. But I know we can get them in the 40 - 50ft range (maybe 60ft). That's still a pretty big tree. Of course it'd take 50+ years to make that happen, but I think it's still something to strive for. The photo above shows my latest contribution.

You may remember a while back I longed for some trees along the parkway (street trees). True to form I change my mind several times before I get set on a final decision. First I had three small plum trees , two on one side and one on the other. Then I decided I was going to move the loner to the backyard, where my flower garden is now. My thinking is planting trees to block all angles of the front of your home is bad form, you should at least have one good angle with unfettered views. A few months later I decided I wanted to replace the two plum trees with a shade tree -- something that would some day fill in and give some nice shade. So I moved one tree to the back patio and the other clawed for life in the unfinished corner. Sadly, it didn't last long. Ok I neglected it. :(

What filled the larger side of the parkway was a nice little oak tree. A Shumard red oak, which happens to be native to texas. Although that would be native through central texas so quite a difference in climate. My experience is these are tough trees though and do well in the alkaline soil and high heat. They are fairly drought tolerant once established. The shumard oak I have in the backyard is really starting to grow vigorously, after three years of course. I think it just takes them a little while to get adapted and set up the roots. Ok where was I? The tree, that's right.. So I planted that tree last fall -- it was a 5 gallon I think. But I got it in my head that I should just pony up for as big a tree I could get my hands on & donate the old one. I was a little scared of the transplant for the old one but I'm going to keep a close eye on it and baby it for the next few weeks prior to planting at my neighbors.

Enter big boy. It's a 45 gallon tree and was a doozy transporting and planting. The good thing is it's in and I think it looks great. It gives me a 10 - 15 year jump on the old tree, so I'll be able to bask in its glory now. Now if I could just get people around here to embrace the idea of a green canopy...

Friday, September 3, 2010

dining room restoration: it begins

This is something I've had on my mind ever since we bought this place. When am I going to start refinishing the copious amount of woodwork in the formal rooms? Obviously I've taken my time. Let's see we bought this place close to five years ago and it always nagged at me. "You better get started refinishing all that wood, especially before you start furnishing". Having a kid only complicated matters. What's important is I've decided to get started. And so without further delay, I have commenced work on the dining room restoration. It begins now.

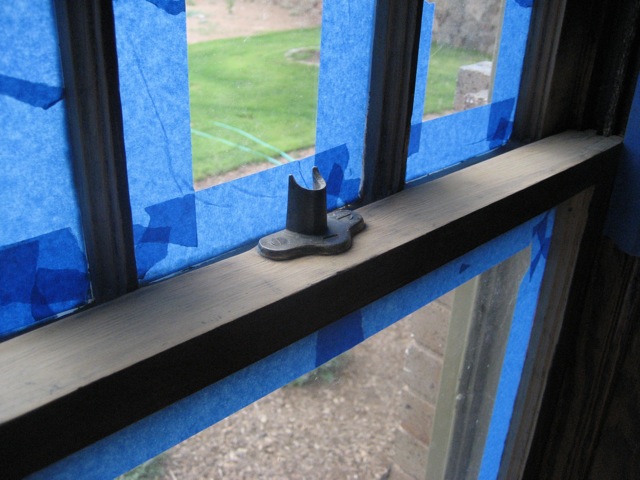
Actually it started around late april when the work on the dining room windows spilled inside. That big middle window needed sanding on the interior detail surrounding the glass. I prepped that, stained and poly'd. Not too long after that I started selectively sanding down the other two windows to address any rot and issues with the finish. What you don't know is that small task has snowballed into addressing all of the issues with the woodwork on that one wall. There was this really cheesy curtain hardware we removed after moving in that left traces of an older finish (see below) as well as a bunch of screw holes. These needed to be sanded and filled. There was also this mysterious black "crud" kind of stuck into the finish. My guess is there had already been a sanding job and they didn't bother to actually clean the wood before applying stain. I suspect all the crud is caked in wood dust. Regardless, it all had to come off. My thinking is why do things only part way that you're still not really happy with? Sure it'd be easier but I'd sleep easier at night knowing that I did it the right way (or at least close to it). Hence a full fledged restoration.

So why the dining room? Well it's the one formal room needing the least amount of work. Only maybe a third to half of the woodwork would need to be refinished. The living room is open to the foyer and to start one of those rooms would necessitate a commitment to complete the other. Not sure I want to do that yet. Ok, so here's what we got going in the dining room. The wood trim is still all there and hasn't been painted. That doesn't mean it hasn't been screwed with though. As I alluded to earlier the finish you see on the lower half of the room is not original, although it is very close. The beamed ceilings are another story. The finish is very nearly black with an obnoxious high gloss finish. Note the light fixture -- that's a story for another day.

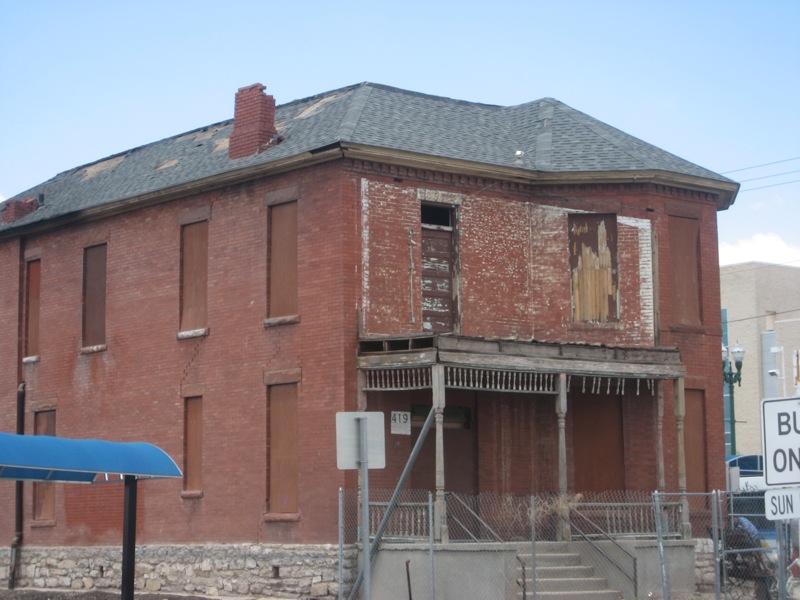
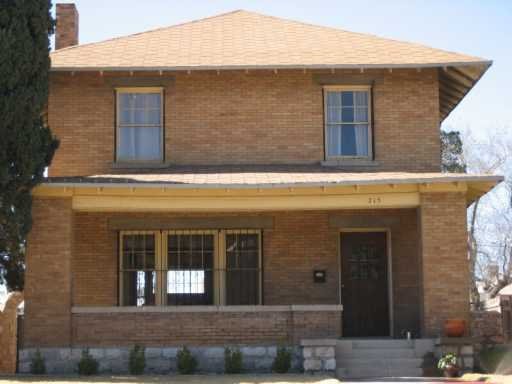
Now don't get me wrong, I've seen several homes in the area with an ebony stain very similar (although not quite as dark). Take the project house for example. That house had a rich dark stain and it was original. When you have an original ebony stain on your woodwork like that, you love it. You cherish it. That, however was not the case here. Don't ask me how I know, I just do. Here's a good example of the stark contrast between the upper and lower finish. The dining room looks halfway decent until you look up. Still makes me cringe.

And this is a shot of the beautiful grain underneath all that black slop. It's difficult getting a good picture since the flash totally makes the stain look like black paint. I know most would turn their noses up when talking old pine used as a stain grade wood. There may be a point to this reasoning. Yes it's not as refined as, say oak or mahogany. It speaks to me though. I actually find the grain in this wood quite beautiful. I think it will take the dining room to the next level. Hopefully I won't still be working on this a year from now..


Thursday, September 2, 2010

pic of the day

A cluster of some of my favs on the far end of the hood..

Tuesday, August 31, 2010

top front windows done

These actually went pretty fast -- well considering how long I've dragged out some of my other windows. Slowly the house is making the transformation from a dull yellow to my snazzy new paint scheme. I'm considering switching from windows to working on the porch to help complete the look. I imagine I'll be working on that for a while if I do start that next. One thing that makes me cringe every time I look at the house is how the porch beam has a subtle but very noticeable sag in the middle. Obviously this is going to get fixed, but I don't know to what extent the damage is. If anything, it would involve pulling off the fascia boards and reinforcing/replacing the structural beam underneath. So it shouldn't damage the paint too much. I can always do touch ups after the fact. I'm hoping to get that taken care of sometime by the end of the year. Cross fingers..

Saturday, August 28, 2010

the new hotness

It's no exaggeration, I've been looking for this register for the better part of four years. After buying the house, I scoured ebay and antique stores for the first year. I was bombarded with tons of cool old hardware, but I could never find what I was looking for. After a while I became disgruntled and forgot ebay even existed. My hopes were dashed and it would seem I'd never find that missing piece of hardware to complete this register. A few months ago my interest in ebay was rekindled and I browsed the hardware section every once in a while out of curiosity. I never expected to see this beautiful auer heat register, but there it was. The clouds opened up and a bright light came down from the sky. I distinctly remember hearing the voices of angels. I always thought to myself that if I ever did see it I would spare no expense to get my hands on it. Well, I wasn't going to spend $300 on it -- but the deal I got on it was way better than that. I couldn't resist.

The plan was originally to canibalize the new register for the faceplate that was missing. This thing just looks too nice though. Once I restore the original I may fall back to that plan, but for now it will inject some much needed eye candy in the dining room. I think these are cast iron but they do have a sort of copper planted finish on them. I love these registers. Here's a closeup of the manufacturer's mark. It says "The Auer Register Co. Cleveland O.".

Drool..


Friday, August 27, 2010

old heat registers

One thing I've been blessed with in this house, is much of the original hardware is still intact. Door and window hardware is 95% complete. The heat registers are all there too, save for the one in the kitchen. I'm still hunting one down to put in there. But probably the most important pieces are these fancy cast iron heat registers. I've seen several homes around here with this exact model -- must have been popular in the 1910s - 1920s. The Auer heat register was apparently made in Cleveland, OH but I don't know much more about them then that. If anyone could pass along any info it'd be most appreciated.

The formal rooms in this house have one of these registers each. They're in fair condition -- some surface rust, a crack here or there but nothing too major. At some point in the future I plan to pull them out and give them a proper restoration. This is the register in the foyer:

The register in the living room:

And this is the register in the dining room. We're obviously missing the face plate the door hinges on, so the door is pretty much stuck open all the time. The thermostat is just on the other side of this wall behind the swinging door and so I'd like to be able to control the airflow out of this one a little better. More of the story to come tomorrow..


Sunday, August 1, 2010

prison decor is so 80s

You might remember way back in the year 2007 I rejoiced after upgrading my home from the cheesy prison look. What I mean, of course, is we removed the wrought iron bars that were on every single window of our home. A huge improvement for this house's curb appeal. If you look closely you'll see the remnants of the bars on the two top story windows over the porch.

I despised these bars the day we moved into this house 4 1/2 years ago and I despised them even more the day I removed the rest of the bars. That's because we kind of forgot about them that day and I figured I would get to removing them in a few weeks. So weeks turned into months, then years. Until yesterday that is. Behold the sad remains. Of course the last piece wasn't going down without a fight. I must have wrestled it for an hour (note bent up piece) :).

Ah yes, much better. I've already started and nearly completed step 1 of my 8 step window process. I'm hoping I can finish these in the next two weeks or so. I'm planning on getting my window guy back over here soon to resume work on another room. We'll restring these while we're at it.


Saturday, July 31, 2010

yep, more window madness

I know, it's been a while. Aside from taking a couple weeks off all things house related, I've been helping restore an elderly neighbor's front porch. I'm only fixing a modest amount of the porch, but it's a slow process. I'm getting close to finishing that, so I'm starting to refocus my energy back to the ol' McBroom house. :)

This is something I've been working on for the past few weeks. I've put a ton of work into this trio of dining room windows, although most has been to the exterior. I can't ignore what it looks like on the inside anymore though. I recently acquired a set of luxurious curtain rods I'm planning to put up over this set of windows. Of course to do that, I need to actually mark everything complete inside & out. If you remember, these didn't look too bad from a distance until you stuck your head up close. The finish wasn't pretty. There was a lot of caked on dirt and the wood was rotted pretty bad in spots.

The repair included lots of scraping out the funk and gluing mullions that had split a little too far.

Ah yes, smooth as a baby's bottom! Today I finally got all the rough and finish sanding done. I added a little wood filler in a couple spots I'd missed too. Once I get the final finish sanding on those last few spots, we're ready for the stain and poly. I am soo ready to get this over with...


Saturday, June 19, 2010

the caples building

The Caples building. Probably one of the most significant buildings in all of downtown. Originally built in 1909 by Henry C. Trost for Richard Caples, former mayor of El Paso from 1889 to 1893. The building was initially built with five stories, but then in 1915 two additional stories were added converting the overall design to Romanesque Revival. I love the terra cotta detailing and arched windows of the upper stories. Aside from the architectural features, it also has a significant history. During the Mexican Revolution, it housed the offices of various Mexican political figures -- most notably Abraham Gonzalez and Francisco Madero. The pivotal Battle of Juarez in 1911 was plotted in the fifth floor. I believe Madero's provisional government as the new president was initially run out of this building. Of course, those were turbulent times and his presidency didn't last long. He was forced out a few years later by Victoriano Huerta.
Ok, enough with the history lesson. As you can see the building is pretty run down -- it's been that way for the last few decades. It was recently listed as one of the most endangered buildings by Preservation Texas. What I find quite exciting is that it finally looks like it's getting some much deserved TLC. The owner recently filed a request to replace all the windows and refinish the window frames on the exterior. I walked by the other day though and it looks like they're actually restoring the windows, just replacing the glass. It's going to look so awesome -- a good start to breathing new life into this old building. I hope they remove the plywood addition between the two towers in the U-shaped design. A lot of the brick and terra cotta could use some love too. My suspicion is this building is getting fixed up now as a result of the new city ordinance to bring vacant buildings (in their entirety) back up to code. So while this building lost its fight recently, I do like seeing the positive of what stronger city enforcement will mean.


Monday, June 14, 2010

billy the kid festival

One of the touristy things to do around town is to check out the mission trail. I think it's still in its infancy in terms of being something that actually draws people from out of town to check out, but the history is pretty cool. I think it's got loads of potential. This San Elizario mission above was built in 1882 and is actually the youngest of the missions. The first in the area dates to the 1600s, so this is a young chap. Even a wee lad needs some restoration work though. Especially when you're dealing with adobe.

The little town of San Elizario just east of El Paso is a reminder of the way things used to be. This town was actually the county seat back in the late 1800s, but when the railroad was built it bypassed San Elizario and instead went to El Paso. What happened was El Paso/Juarez grew into a metropolis and San Elizario stayed a small town with agrarian roots. One thing that's always interested me is the Old West lore of the late victorian times. John Wesley Hardin, Dallas Stoudenmire, and of course Billy the Kid. The first annual festival I attended over the weekend was pretty cool. I annoyed my wife with my best Estevez-esque "I'll make you famous" (ca. Young Guns) until I wore her down to go check it out. It was a little light on attendance, but I was pretty impressed nonetheless by the little town that could. Quite a few of the old buildings have been restored and are inhabited by galleries and restaurants.

Some are still waiting for some love.

This is the old county jail that Billy the Kid busted a friend out of in 1876. Uber cool.

A re-enactment troupe called Six Guns and Shady Ladies provided lots of gunfight recreation mayhem. It rocked.


Friday, June 11, 2010

the Gist boarding house

Whenever I walk downtown I tend to pass this building. It's located in the northern part of downtown, roughly in what I call the "dead zone". The Sunset Heights neighborhood overlooks downtown -- the buffer between my neighborhood and the real downtown is the dead zone. First you got the interstate (built in the 60s) that severed the neighborhood from the commercial center. Over time, the old buildings in this roughly 18 block area just south of the freeway took a dirt nap. Currently there are about 10 or so vintage buildings in this area. Think about that for a sec. The vast majority of the dead zone is parking lot or insignificant modern construction. Looks like we can scratch another building off the list.

The other day I was floored when I saw this cool old building missing its hat. At first I was optimistic and thought "oh they're just going to put on a new roof, no big deal -- it's about time". Alas, it was not to be. Today I passed by again and a substantial part of the brick walls are torn down. Now the building itself isn't a particularly amazing piece of architecture. A late victorian apartment building with some neat features. I liked the bay windows and the turned posts on the porch. Years ago there was a fire here, not sure if it was also when the victorian house next door burned down.

The building at 419 El Paso St was built in 1898 for Sarah Gist as a boarding house. Several of the tenants were doctors associated with one of the first hospitals in el paso. As far as I can remember this building has been abandoned and in shambles. There is development going on just south of this block so there may be interest to sell. However, my guess as to why it's coming down now is it was a preemptive move. The city is getting serious with abandoned buildings and is on the verge of unleashing a new ordinance to enforce the codes that downtown building owners have been ignoring the past 30 years. On top of that, the Historic Landmark Commission had an interest in this particular building for a historic overlay. With the building gone, the owner won't have to worry about getting visits from city inspectors and/or historic preservation. Part of the charm of downtown is all the old buildings. You'd never know it by walking through the dead zone though. Here's hoping the property owners who still own the handful of vintage buildings in this area consider the value of the brick and mortar, not just the land underneath them.

Not to be all doom and gloom, I'd like to highlight other buildings that are actually getting fixed up -- possibly by the threat of the same city ordinance. I'll save that for next time.

Thursday, May 27, 2010

are we done yet?

Yes, I think we can finally check these off yet again. I'm hopeful this time it's for good. And while I'm anxious to get started on a new view of the house with my window rehab, I think I'll take a week or two off from house projects. Then I can get cranking on these again. There's still much to do and I'm determined to get my house completely painted this year.

Tuesday, May 25, 2010

more progress shots

Not sure if this is worth posting, but I think it's kind of cool.. :)

Sunday, May 23, 2010

coming along nicely

Ok so with the old rotted trim removed, we can finally see how it looks with some tight new wood. The right side was really bad, but the left only needed the lower half replaced. Hopefully we've fixed all the issues with this window. I think once we get it caulked and water tight it should weather very nicely.