it's a snow day in EP.. :)

 So from a previous post about my window insulation adventures, the obvious question would be "are you satisfied with the performance"? Well, it's complicated. On the one hand, yes I've cut down the draftiness in these windows bigtime. By insulating the sash pockets, I no longer have to worry about cold air seeping through the sash chain opening. That's a relatively simple fix (and effective) -- I've begin upgrading other windows in the house starting with the office. The other part of the equation is the easy stop insulation.
 Meet "oakie" my prized Shumard oak tree, living up to its Southern red oak lineage.. When I first bought this tree it looked like a two foot stick with a couple small branches. Every year it gets progressively bigger and fluffier. The fall colors keep getting more spectacular too. I can't imagine when this thing is 60+ feet tall, that'll be pretty sweet.
 I also replaced the aluminum window jamb liner (I think that's what you call them) with copper V strip. The old stuff worked ok, but the channel in the sash was too wide for the liner to keep tight. A big point for drafts to pass through. The new weather stripping should hold the sash tighter and provide a more solid barrier against the wind. Well that's the hope at least..

 The contractor had added railing to the deck and replaced some warped pieces earlier this year. It had only gotten a partial finish treatment. I didn't buy enough stain/sealer at the time and so it looked so-so for most of the year. I finally built up the will to do some light sanding and a hose down prior to finishing the sealing. I think it looks pretty good too. Till next time! :)


 A while back I daydreamed about expanding the historic district my house sits in to help protect old buildings like these. These buildings lie just outside the district lines and while most are in decent condition (despite 90% having already met their demise), there are a few that could use a lot of love. The building above was one of those (it's the last one in link above). Sadly we'll never know if this building ever could have made a comeback. The rumor was it was burned down by transients the other night. The next day the city had the remains demolished for safety reasons. I don't understand some property owners. You do nothing in terms of building maintenance and watch your property slowly waste away. You're too lazy to tear it down so you wait a few decades, count on the eventual fire, and then get the city to tear it down for you.
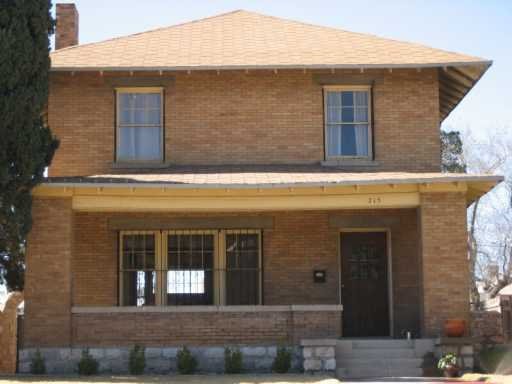
Where to begin? The past five and a half years have been an experience I don't think I'll soon forget. Back in january 2006 we finally closed on an American Foursquare house in the Sunset Heights neighborhood of El Paso, TX. We were young and naive, but knew we loved old houses. We had recently moved from Chicago, IL and had grand visions of the potential in this house. Little did we know the amount of work we'd be in for. Improvements started off slowly but we gradually upped the ante for each project we completed. Progress would eventually freeze as we took a year hiatus to focus on raising our first child. For better or worse, it didn't take long for the house to beckon me to continue where I'd left off. This is our story.
The house is a fairly modest brick foursquare built in 1914 (maybe 1912) for Joseph H. McBroom, a city attorney. We recently completed the exterior paint and tweaked the front porch. Painting exterior windows was something I've been working on for a few years. The house has obvious leanings to the Arts & Crafts style in the interior. Lots of thick, chunky molding and straight lines. The formal rooms are what drew us to this place -- the living room fireplace flanked by leaded glass built ins, the coffered ceilings, and the dining room pseudo-wainscoting.


Since I can't just work on one thing at a time, I have several projects to burn time and money on. Probably one of the most time consuming has been the restoration of the windows. I've been blessed in that all the original windows were all still there, but it has taken much time and patience to scrape these down, repair, and paint them. Actually this is something my recent exterior paint-fest didn't fully address. There are a few windows that are only superficially painted to allow me to remove and repair them with ease. Currently working on the windows in my daughter's room.

I know when I first told my wife about my plans for the parkway, she thought I was crazy. "Leave well enough alone -- can't you just finish the projects you're already working on? Yes dear." Since I'm a glutton for punishment, I decided to slowly remove the tan landscaping rock (and donate it to a neighbor). In it's place I added compacted rock screening (curse you screening!) from my backyard to act as a base for the brick pavers I had planned. Who doesn't like brick lined streets? I know I do. There's just something so cool about it I think. A big plus is the school across the street already has a similar paver lined with trees in the parkway. Helps complete the effect I think. Add a meaty shumard oak tree to the mix and you have the potential for landscaping glory. I got the big side of the parkway complete (well mostly), so the other side shouldn't be too big a deal. I already have the landscaping fabric topped with compacted rock screening. When I have time, I need to pick up where I left off.

Partially out of guilt for indulging in grass and non-native trees, I have dedicated a corner of my yard for native plantings only. Actually the truth is I really do love the look and smell of the chihuahuan desert. And so the desert garden was born. I've been gradually removing rock screening and carving out planting beds. I then lay down landscaping fabric over the beds and sift all the dirt out of my rock screening so as to minimize weeds taking hold in the new beds. Several varieties of native plants have begun taking hold including creosote, sage, yucca, and desert willow. I've had a few bite the dust over the time I've been working on the desert garden (note to self, yucca don't like fertilizer), but the ones that have taken hold are quite healthy and happy. This project is currently on hold as I need to get the remaining screening piles hauled away to continue building the gravel path and remaining planting bed.

I recently had a new roof installed -- the roofers kindly destroyed this flower bed, which I've since resurrected. Not done yet, but looks a million times better.

Of all my little projects this is one of my favorites. I get satisfaction in bringing the dining room back to what it must have looked like 100 years ago. It wasn't too bad to begin with -- all the wood in this room had never been painted. It had been screwed with though. There was some serious wear, particularly around the windows. I've restored all the wood trim on the far wall and my plans are to fix the row of windows on the side wall. First I need to finish sanding down the wood on the ceiling. I'm about 2/3 of the way though. One other little detail I finally got around to was installing wainscot style trim under the side windows -- this had been removed at some point and I had to get the local lumber mill to cut these down to the proper thickness. Oh, I also installed an Auer heat register I had spent nearly five years searching for (thanks ebay).


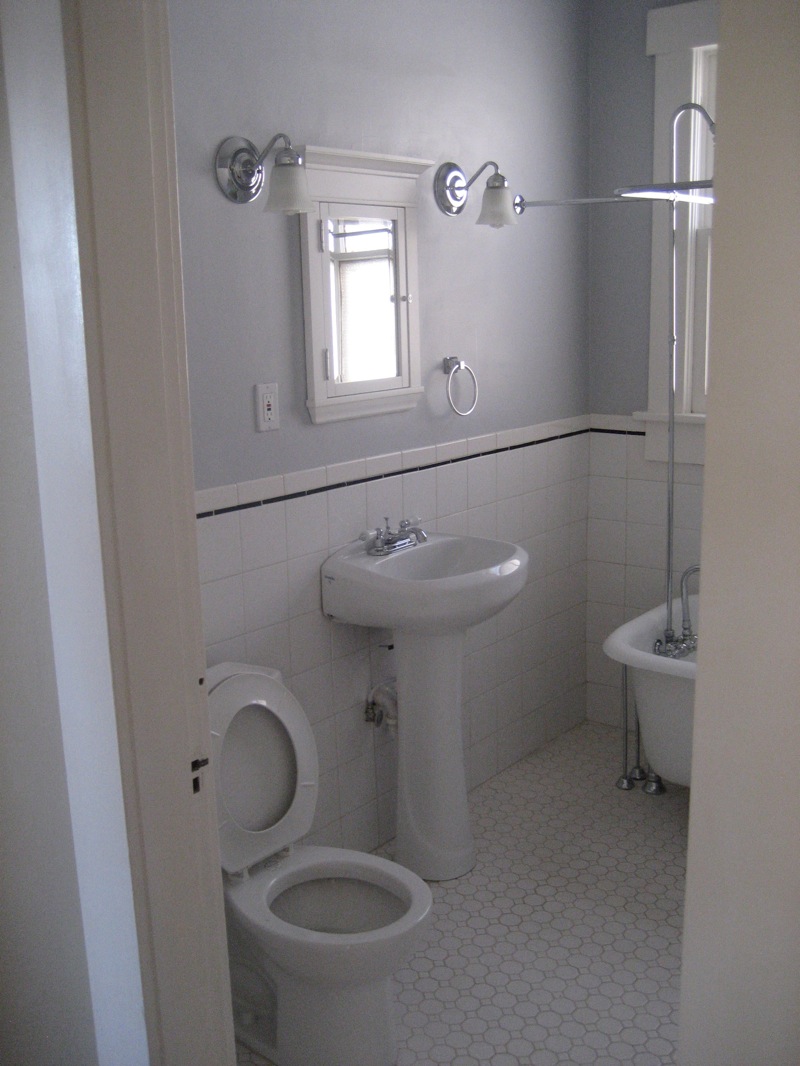
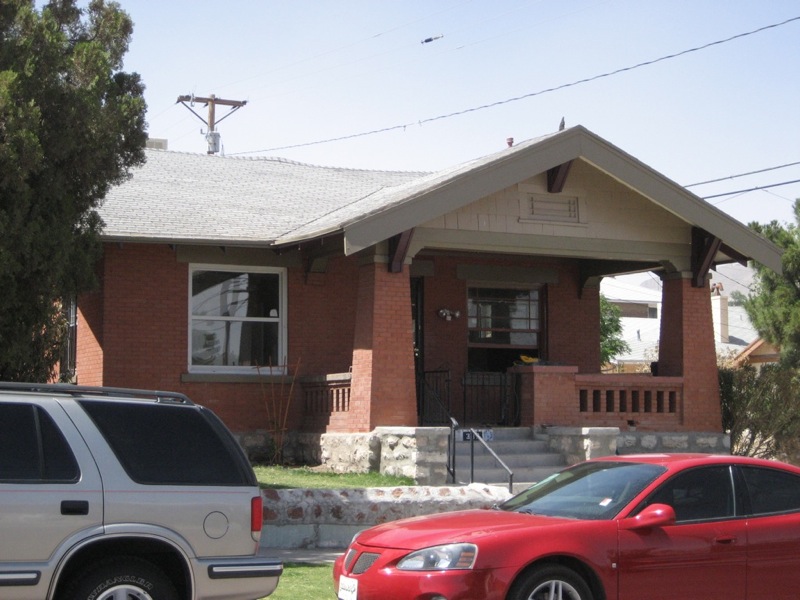
And last but not least, the project house. Not to be confused with the project house we worked on a few years ago. This little bungalow was built in 1913 in an old neighborhood not too far from where we live. It retains much of its original charm, from the exterior with its chunky brackets and beadboard porch ceiling to the interior with its beefy crown molding and kitchen built in. The bathroom is pretty sweet with hex tile and clawfoot tub too. From a previous post about exterior paint colors, some people were drawn to the blue paint scheme, while others were not. The colors we chose were #3. Roycroft Brass was the major trim and Weathered Shingle for the gable shingles. Classic light buff for the soffits and Rookwood Dark red for the brackets and rafters. If it looks familiar that's because it is. My house is painted in roycroft brass and rookwood red. Very similar scheme but this one feels a little more jazzed up. The red is a little darker than the one I used on my house. Honestly my first choice would have been the blue too. I don't know -- I've had a thing for red brick and blues for some reason.. Anyway that was voted down and the current scheme was chosen since it was a little safer. I wasn't sure it would work in the final product, but I'm happy with it. The old house cleaned up well. Excuse the mess -- it's still not quite done (at least in these photos). Stay tuned and I'll throw up some proper before/after shots in the next week or two..


 Thanks for visiting!